Sewing a FREE Shacket for Kids
- Vivien Field
- Sep 10, 2023
- 6 min read


Heres yet one more tutorial for all those who love to sew FREE stuff for their kids. This time I thought of a cross season sew and worked on one of the popular sewing trends from last year. The Shacket (Or Shirt-Jacket). These are simple hacks of Jacket or sweatshirt patterns to create a snap or button front top with a hood and usually knit cuffs (saves on the buttons needed there). I am going to use a FREE German Language pattern as the base of my hack so you can see how to adapt your pattern too. I have chosen this one as its for a set-sleeve style rather than raglan design. Although you could do a Raglan top instead its a lot easier and more in keeping with the shirt look to go for set sleeve rather than a raglan sleeve. So if you want to follow along and sew the same shirt-jacket for your child then please go ahead and download the FREE PATTERN yourself (click on the link).
If you want to make the Sweatshirt jacket instead you can go along to the original Tutorial over at Snaply Magazin and follow how to make the hooded zip front sweatshirt yourself. Otherwise follow my tutorial below to adapt the pattern into a Shacket.
What You Need:
Scissors, Pen, Paper, Ruler and Sellotape
Printed and taped together Pattern (see link above in comments)
Suitable fabric (Knit or woven) approximately 1m x WOF (150cm)
Pattern weights or Pins
Wonder Clips (optional)
Sewing Machine (standard and overlocker)
Suitable Thread
Snaps or Buttons
Interfacing suitable for your fabric choice (woven or knit)
How to Adapt your Sewing Pattern:
Notes:
As I said at the start of this tutorial I am going to be using the FREE Sweatjacket pattern from Snaply Magazin to hack the Shacket design from. This hack isn't just for kids, if you have a basic jacket or hoodie pattern for adults you should be able to recreate these easy steps to create your Shacket design too. Its easier than you think ;-)
I have chosen some Cotton Spandex knit I had in stash for this tutorial but its equally suitable for Woven fabric like Flannelette for the Body of the Shacket, although I would advise to size up in width maybe at least two widths if you are using a stiff woven. Keep the same length of sleeves and body but size out two lines in the width of your pattern (so if your child is a size 5 years trace the size 7 years lines at all side seams and keep sleeve length the same etc).
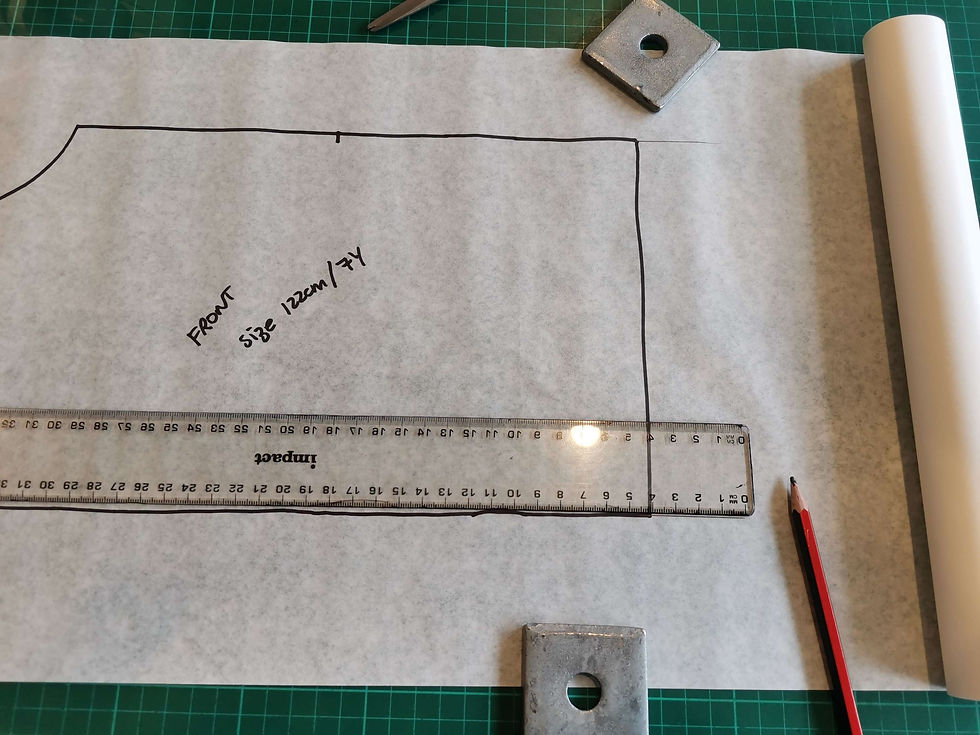
So without any more chatter lets trace our size from the preprinted and taped together sewing pattern and start the hacks required to create the Shacket design.
You'll need your Front, Back, Sleeves, Cuffs, and Hood pattern pieces traced. Omit the front facing, and Hemband pattern pieces as we won't be using those.
Adapting the Front Pattern Piece:
First off lets add an overlap and curved hemline onto our Front pattern piece. For this you will need extra paper, some sellotape and a pen. It may also help to have a ruler on hand and perhaps a French Curve or just a large circular object you can trace around like a bowl, or plate.
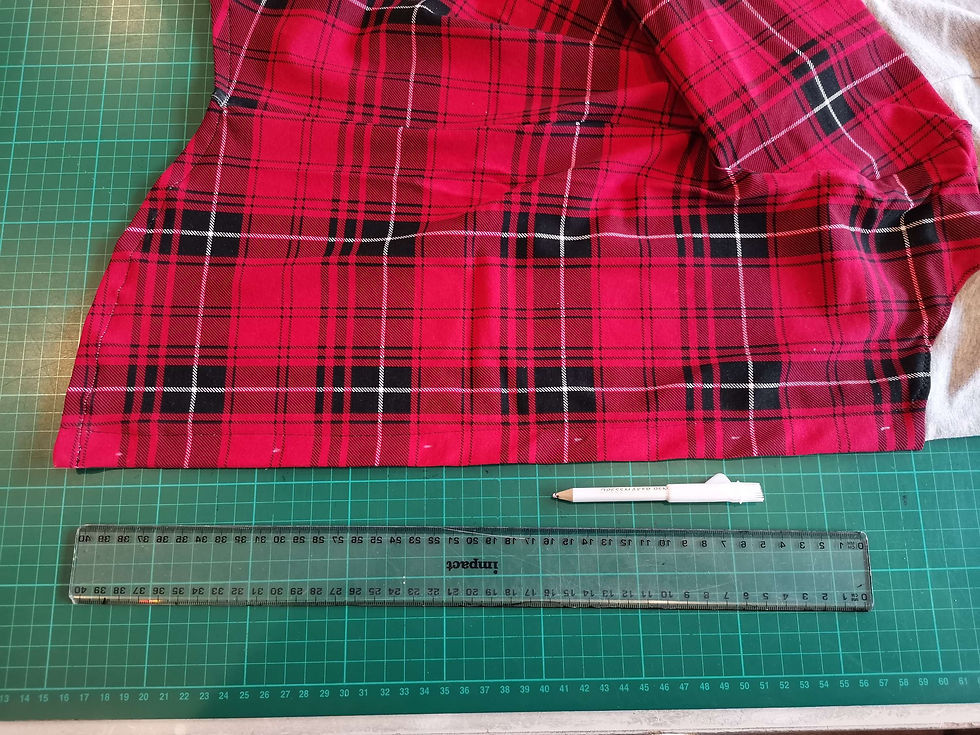
Sellotape a large piece of paper to the bottom of your Front Pattern piece (or trace your front pattern piece onto a large enough piece of paper as I have done and leave room to do the additional add-ons). Measure down from the bottom of your Front pattern piece approximately 8-10 cm and draw a line from each side and front and join those two lines to create a new Hemline. (see picture).
About 2-3cm from the side seam at the bottom hem place a mark. Also on the bottom hem about 6cm along place a mark as well. Using a plate trace a curve between those two markers (or freehand a curve yourself). You have now created your Shacket curved Hemline.
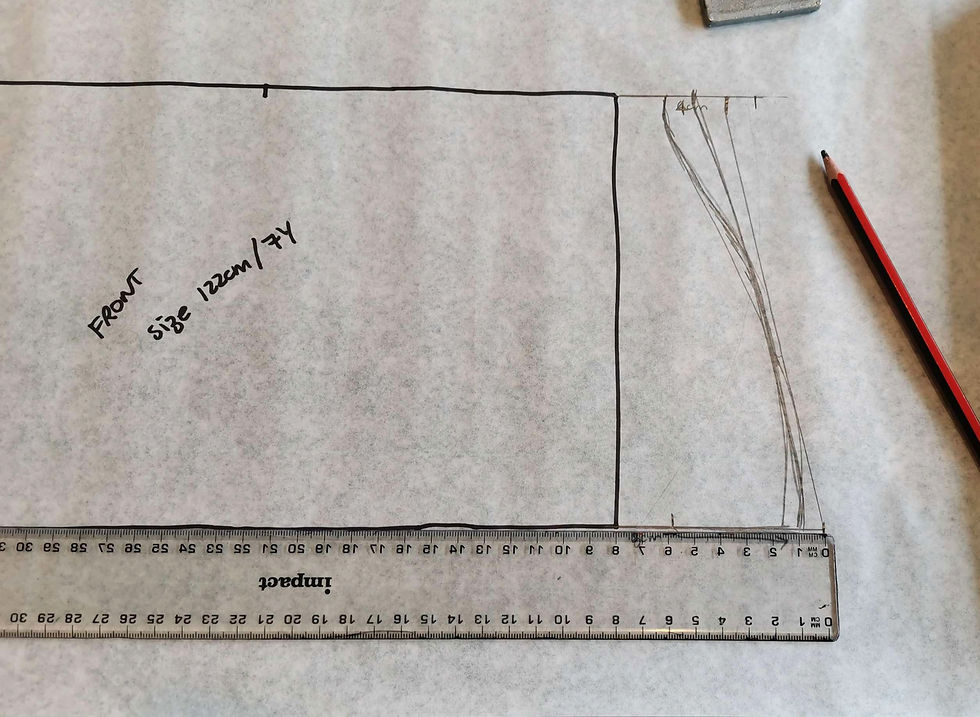
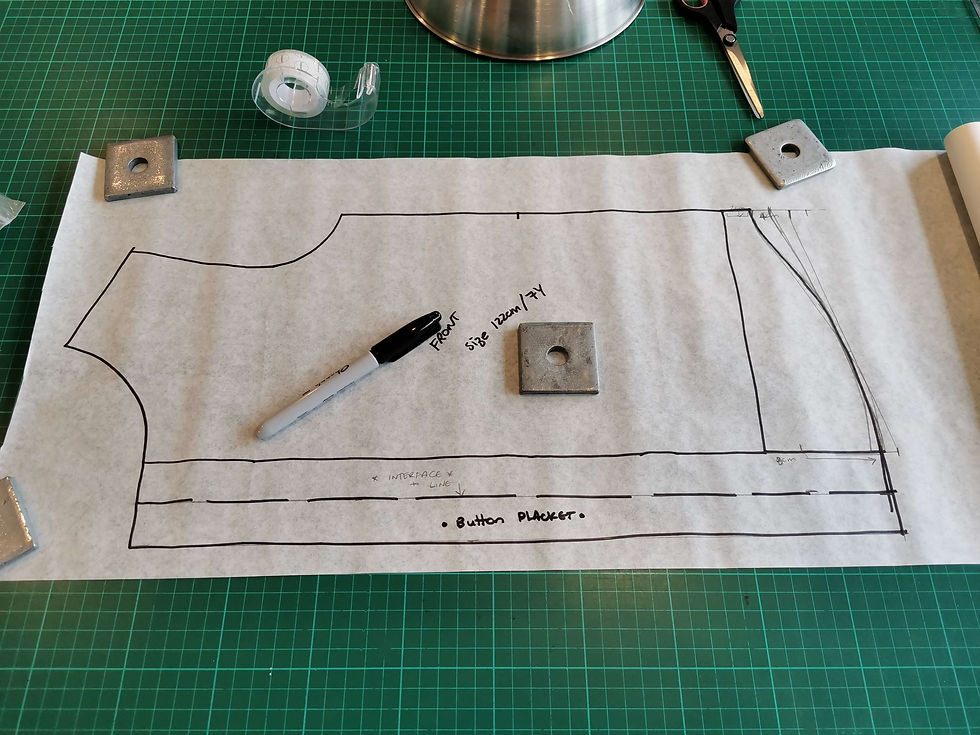
Grab a long piece of paper and sellotape it the entire length of your Front pattern piece from the bottom of the neck curve to the bottom of your newly traced hemline. Measure out approximately 5-6cm and mark all along the front 5-6cm from the original Centre front seam. Join all the markers to create your new Centre Front Overlap edge. Repeat that step at 2.5-3cm out from the original Centre Front seam. You have now created your overlap facing for the Shacket.

Note: I actually found I needed to add extra to the length of my top after putting it against the Mannequin and finding the top was just a little shorter than I wanted. So I cut at the original hemline and added a piece of paper about 3cm wide to lengthen my pattern piece the desired length.

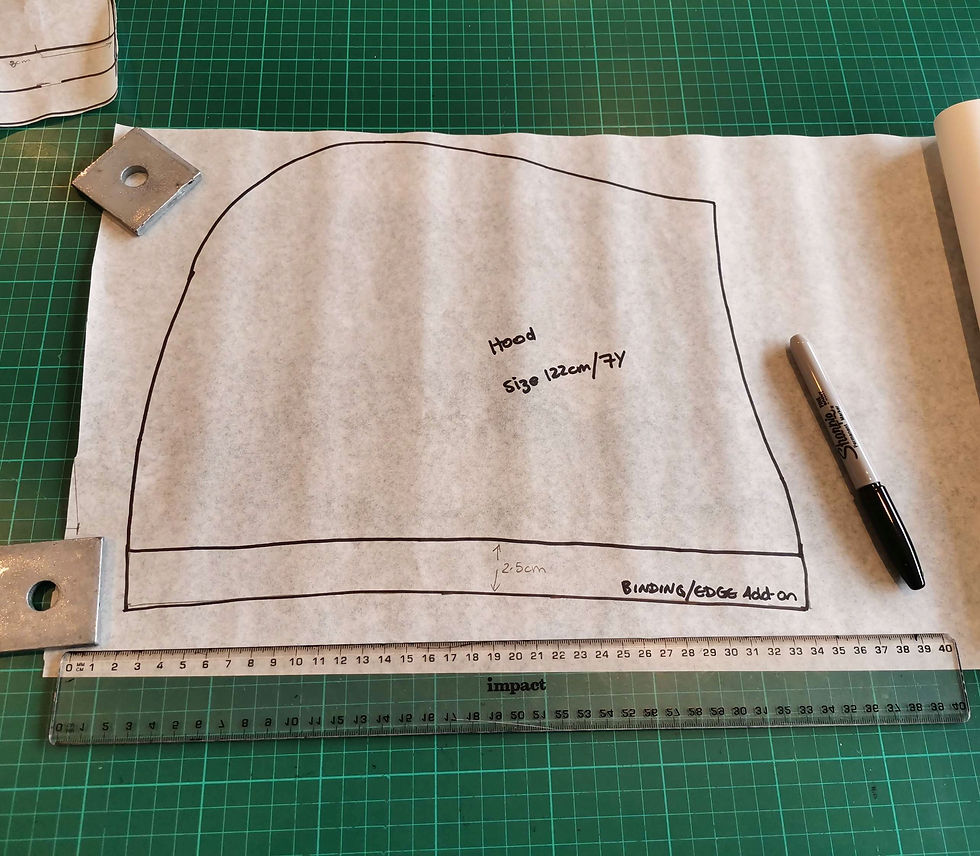
Adapting the Hood Pattern Piece:
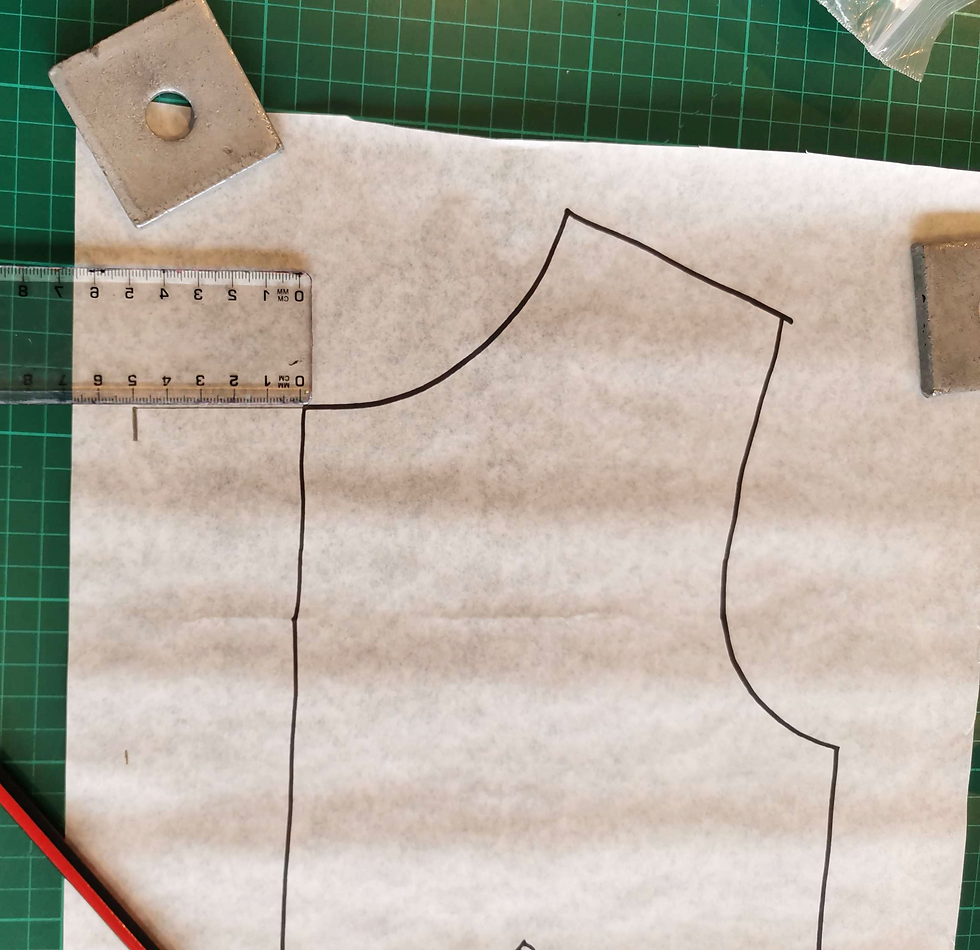
Grab your Hood Pattern piece and sellotape a large piece of paper to the front (or trace hood pattern piece onto large enough piece of paper with room to add adjustments as I have done in my example). You'll need to measure out 2.5-3cm out from the front of the hood pattern piece and place markers. Draw a line between the markers to redraw the wider hood front as shown in the photo.
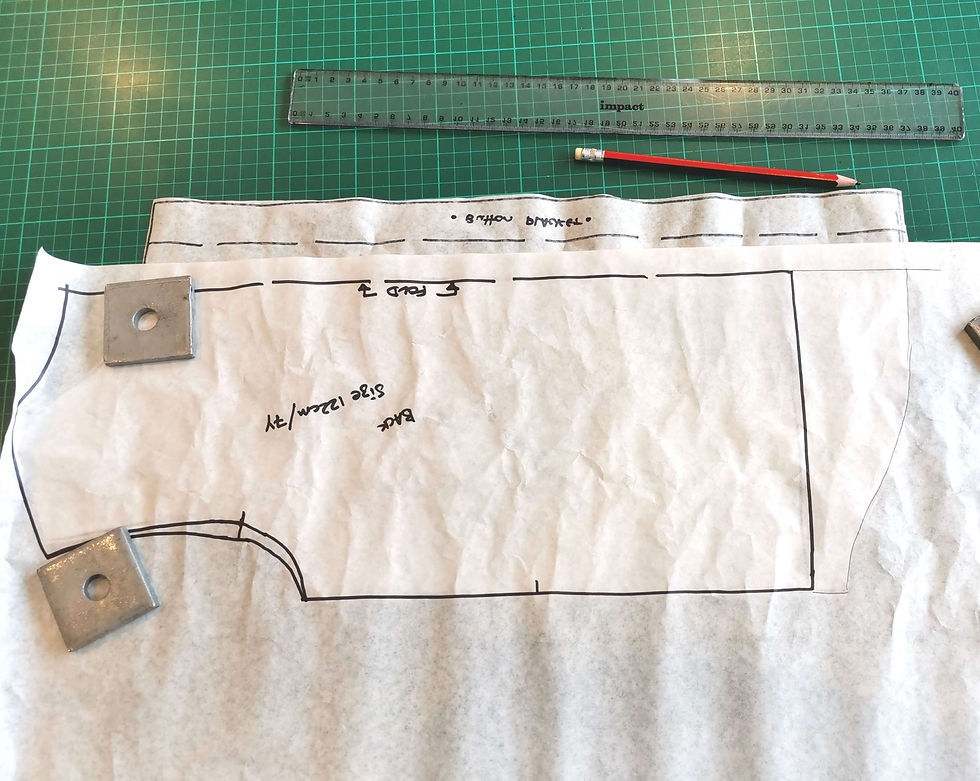
Adapting the Back Pattern Piece:
Grab your Back Pattern piece and sellotape a large piece of paper to the bottom. Flip over your Front Pattern piece and lay your Back Pattern piece over it so the side seams are aligned. Trace your Curved hemline to the Back. You have now added your Curved Hemline to your Shacket.
Your Other Pattern Pieces:
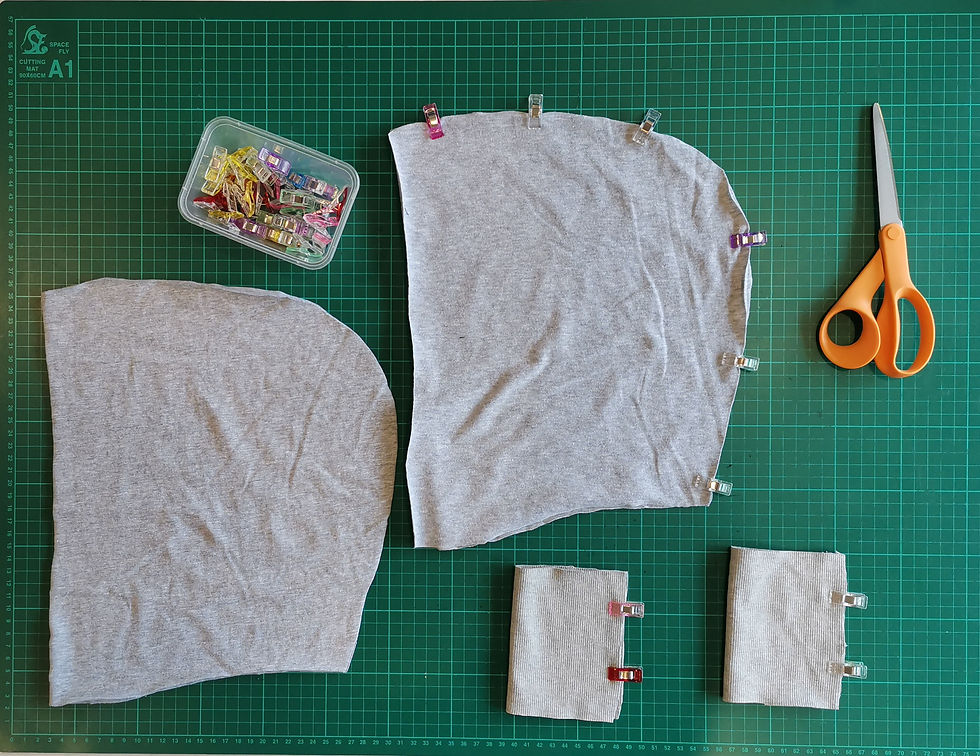
You won't need to adapt your other pattern pieces although I might suggest you widen the Cuff pattern piece so you can cut 2 easily without having to cut them on the fold. You should now have the following Pattern Pieces:
Adapted Hood
Cuffs
Adapted Shacket Front
Adapted Shacket Back
Sleeves
Believe it or not that is all you are going to need for this simple design!
Cutting out your Shacket:
If you are using a pattern like I am without seam allowances you will need to add those as you cut. If you are adapting a pattern with seam allowances you should be fine.
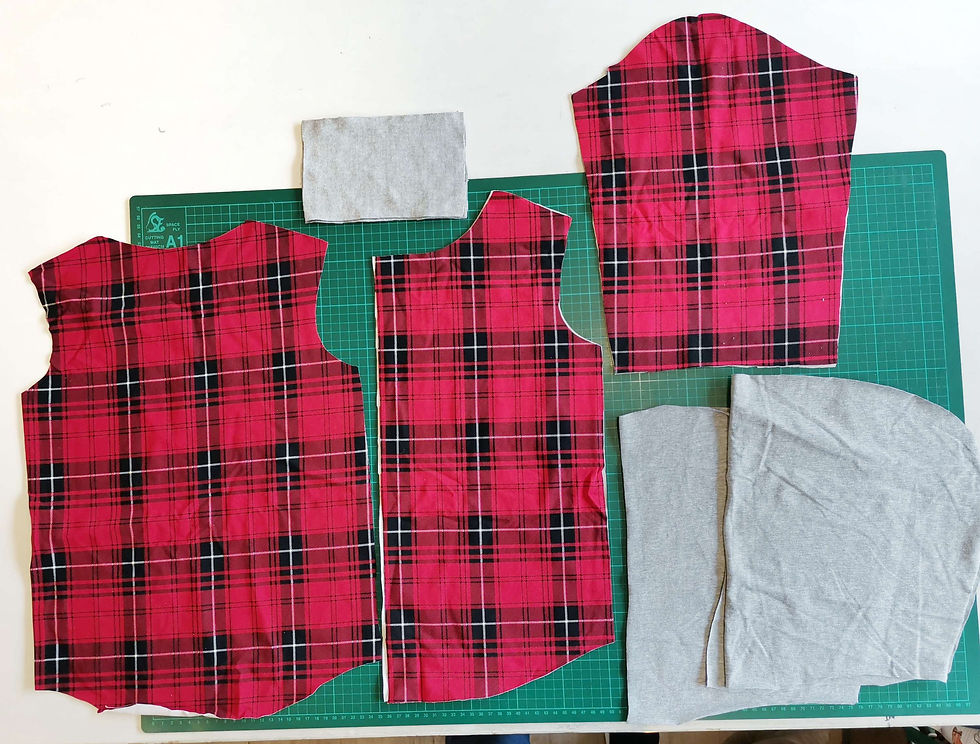
You will need the following Cut out (see comment about Woven vs Knit fabric). Remember to go with the Nap, stripes or checks and make sure they align when cutting out.
2 x Hood pieces, plus 2 x Hood lining pieces
2 x Front
1 x Back on the fold
2 x Sleeves
2 x Cuffs
2 x 2.5cm wide by length of your Shacket Front Pattern piece of Interfacing
NB: If you are doing a mixed Woven/Knit version then only cut your Front, Sleeves and Back from the Woven (e.g. Flannel) and cut the rest from the Knit fabric like Ribbing for the cuffs.
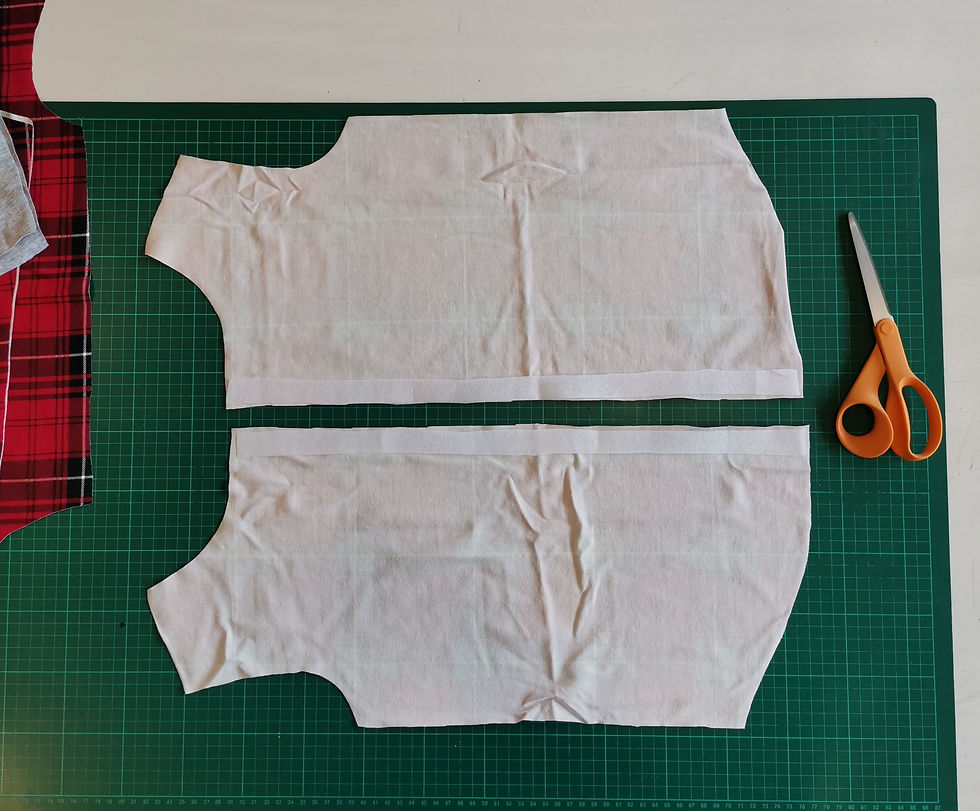
Iron each interfacing strip to the wrong side of each Front piece aligning the edge with the outer edge of the front piece.
Sewing up your Shacket:
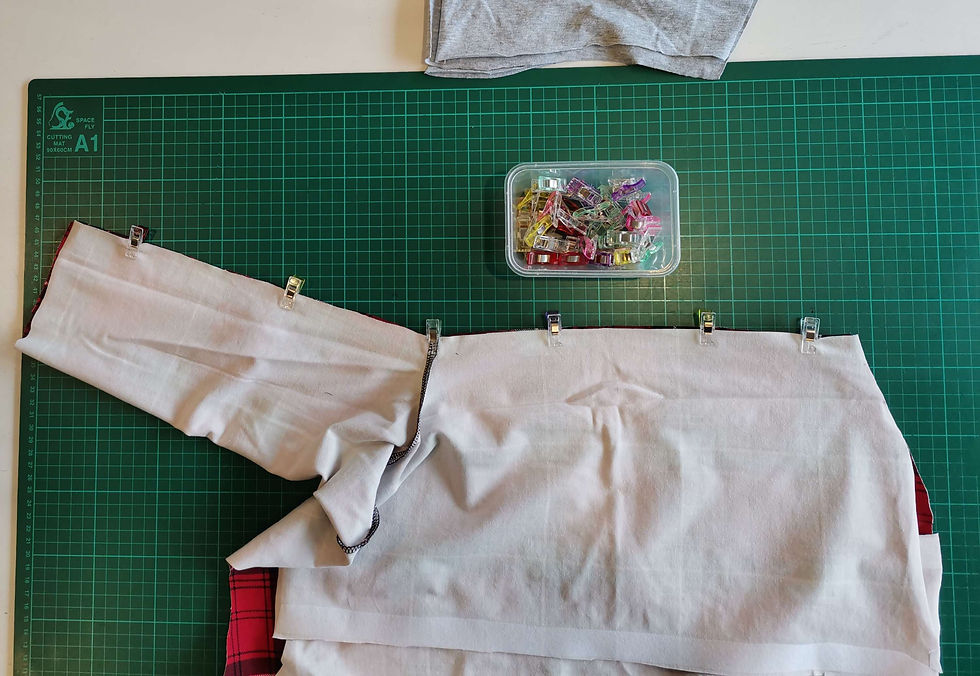
1. Sew your Front pieces to the Back Piece at the shoulders.
2. Sew Both sleeves to the armholes. Sew side seams and arm side seams all in one go.
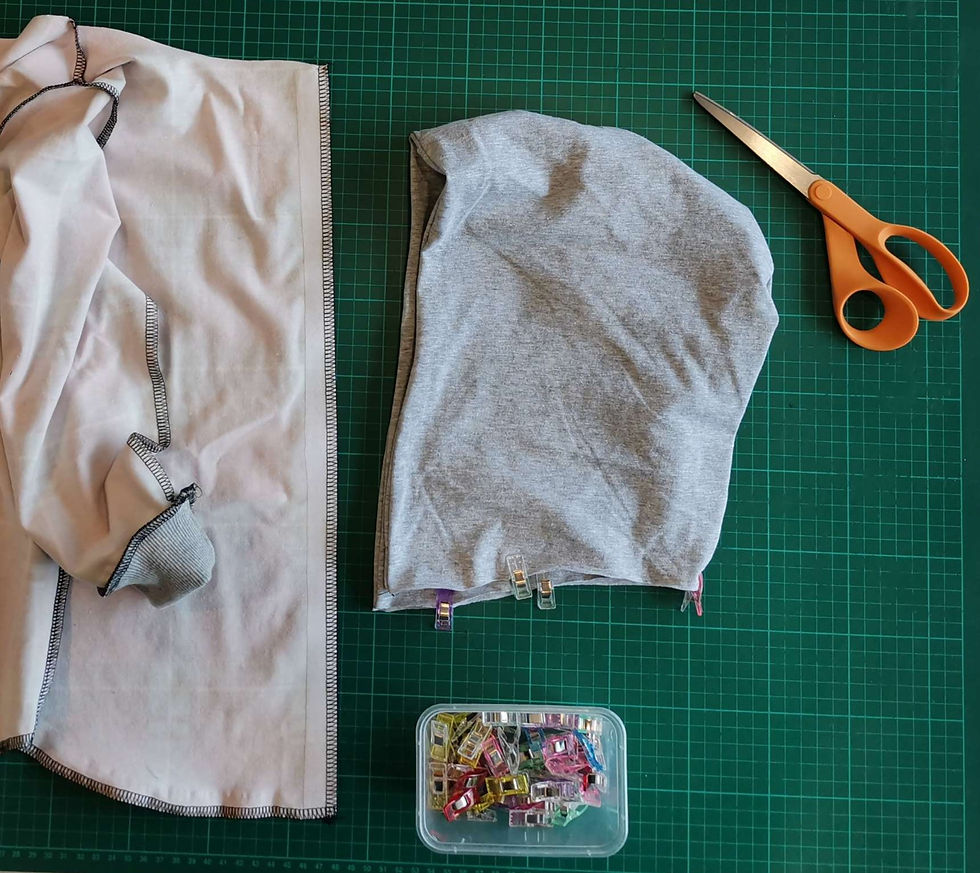
3. Sew up the cuffs and both Hood Outer and Lining centre seams.
4. Insert cuffs into the sleeves right side to right side and stitch to sleeve ends pulling slightly as you go.

5. Tuck Hoods right side to right side and pin or clip the front edge matching the centre back seams of each hood. Stitch the outer edge together.

6. Turn hoods right side out and press. Overlock or zig zag finish the hemline of the shacket and front facing edges of the fronts.
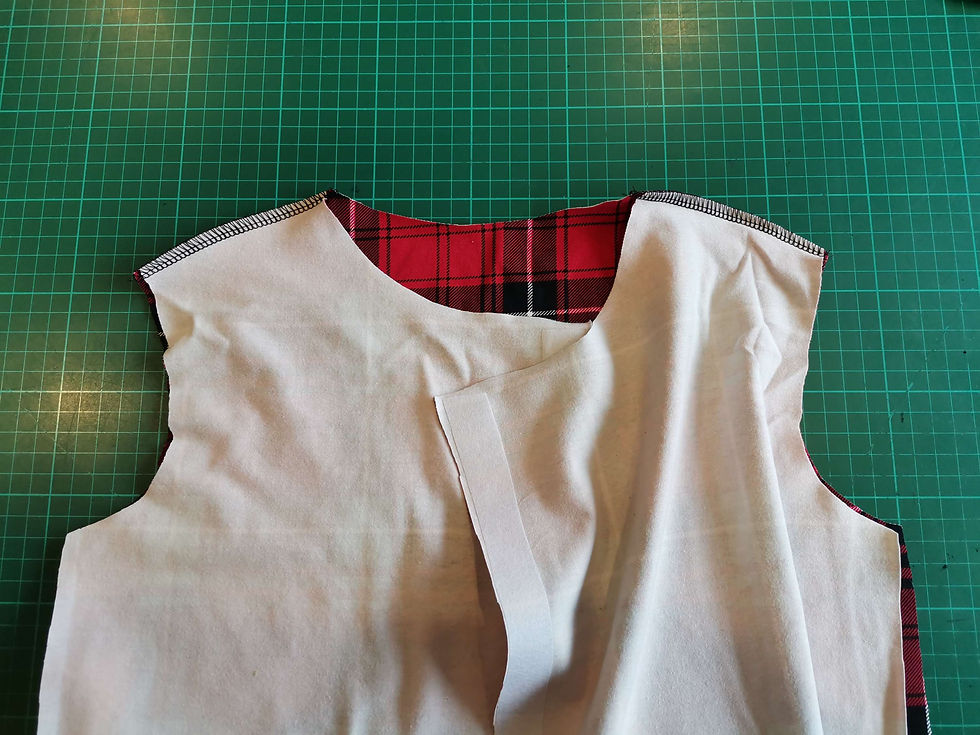
7. Clip or pin hood to the neckline right side of the outer hood to right side of the body. Match the centre back of the hood to the centre back of the neckline. The hood should sit about 3cm from the facing edge (see the photo)
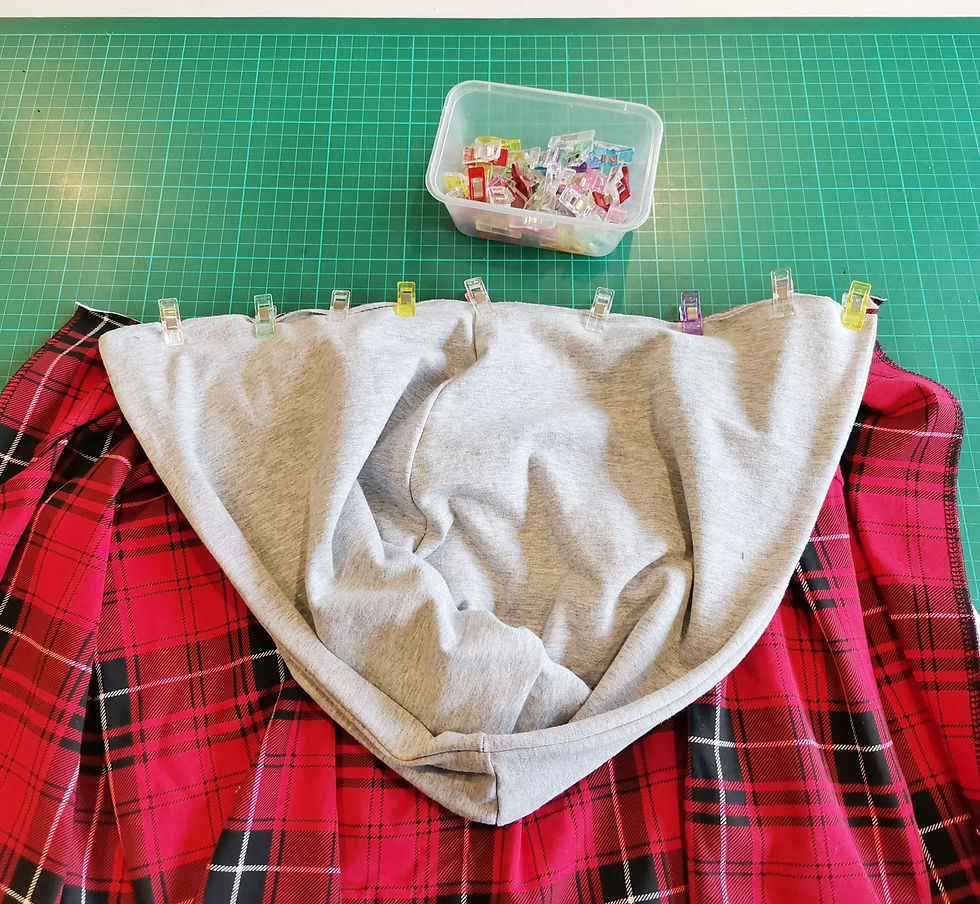
8. Fold the facing edge over the hood and clip the right side of the facing to the right side of the top, sandwiching the hood within. Overlock or stitch the neckline catching the hood and facing in one. (see photo)

9. At the hemline fold the facing over the bottom edge, right side facing to right side top front. Stitch across the facing with a straight stitch catching the pressed edge as shown in the picture. Clip both the top and bottom of the facing and fold back towards the wrong side. Press.

10. Using a straight stitch and starting at the neckline stitch on the inside the facing down against the overlocked edge as shown. Topstitch the neckline down using a small zig zag stitch or coverstitch.

11. Press and stitch the hemline using a straight stitch or a coverstitch.

12. Mark the front facing edge button or snap placement. I usually just measure the length and divide that by the number of buttons or snaps I want to place on there. Usually its about 8cm apart for sizes 7 years like my example.
13. Add snaps or buttons to the front as you prefer and you are done. :-)
One Stylish easy to make Shacket for yourself or someone else! This pattern is easy enough to make in French Terry, Polar Fleece, Sweatshirting, Woven Cotton or Cotton Spandex as I have done here. I have used 9.5mm Ring Snaps for my example as the fabric I used was actually quite light and I was concerned buttons or button holes just wouldn't sit nicely or would tear and stretch. Feel free to make your own choice of what closure you would like for these. Don't feel like you need to do it exactly how I have described above, mix it up, put your mark on it. If you do make one share it with us over at @ OTY Fabrics Share Group on Facebook or tag us on Instagram @picklefishproductsnz.
Thanks for following yet one more of my Tutorials :-)
Vivien


Comments